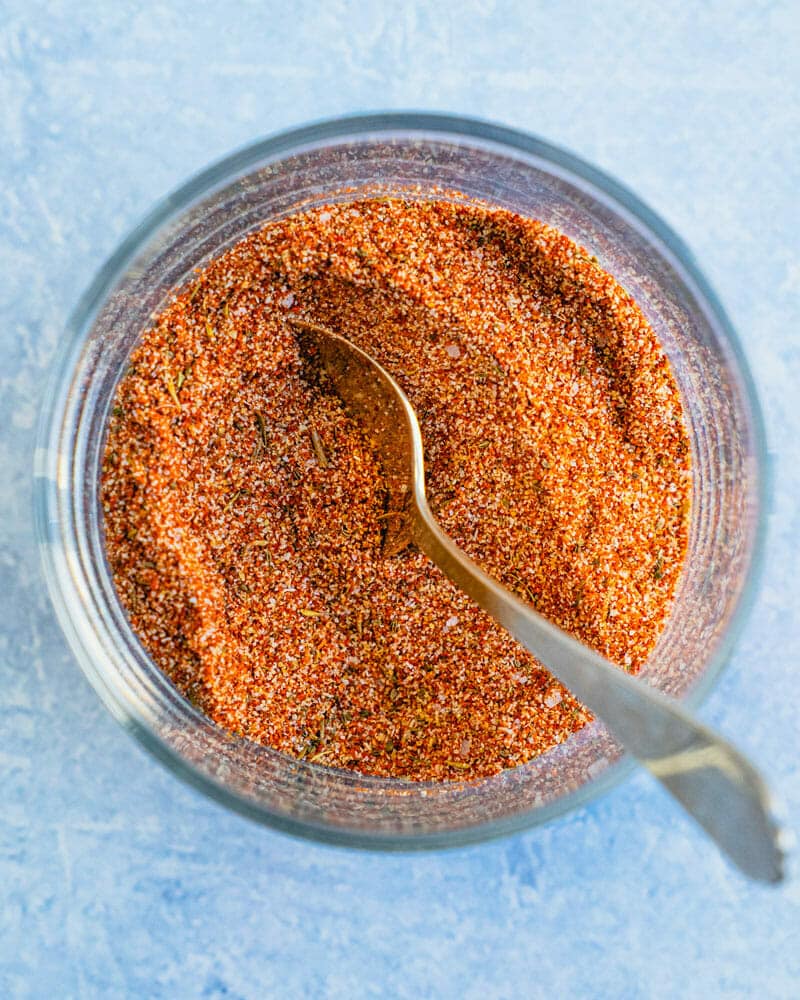
Tasty Salmon Spice Blend
This enchanting salmon seasoning mixture turns any salmon into a remarkably flavorful fish in just minutes. Crafted with smoked paprika, garlic powder, and a selection of savory spices, it is perfect for grilled, baked, or pan-seared salmon.
Wishing to elevate your salmon’s taste to the extraordinary? Give my enchanting salmon seasoning a try! I refer to it as magical since it genuinely transforms a piece of plain fish into something fabulous.
This blend is suitable for any type of salmon and offers a finely balanced spice mix that enhances the fish’s inherent richness. After discovering this combination of flavors, I ceased using any other seasoning recipes. Just grab a jar of this salmon seasoning and you’re all set, whether you decide to grill, bake, or pan fry!
Why This Is the Ultimate Salmon Seasoning
I assure you, everyone will notice when you incorporate this salmon seasoning! Over the years, I’ve received numerous compliments on this recipe.
In its creation, I drew inspiration from Old Bay seasoning, renowned for seafood, and merged it with elements from my favorite blackened seasoning. The outcome is a blend that tastes like something you’d find in a restaurant, utilizing spices readily available in your pantry!
The hidden gem here is smoked paprika. This Spanish spice contributes a delicate smoky richness, making it a worthy addition. Each time I include it in my seasoning mixes, people take note!
5 Star Reader Review
⭐⭐⭐⭐⭐ “This seasoning is fantastic!! I added about 2 tbsp of soft brown sugar since we prefer our salmon a bit sweet and it was perfect. The best salmon I’ve had in quite a while.” -Shelly E.
Ingredients You’ll Need
Here’s what goes into this salmon seasoning mix, along with kosher salt:
– Smoked paprika: This is a Spanish variant of paprika created from peppers that are smoked over a flame. It’s available in the spice aisle of most grocery stores and online, often labeled as pimentón, Spanish smoked paprika, or sweet smoked paprika.
– Garlic powder: Provides savory, aromatic qualities that pair well with fish.
– Onion powder: Introduces complexity without being overpowering.
– Thyme: A traditional herb for seafood that offers subtle earthy undertones.
– Celery seed: This is the key ingredient from Old Bay that binds everything together.
– Cumin: Contributes warmth and a touch of earthiness.
– Allspice: This also imparts background warmth (the secret additive from blackened seasoning).
How to Season Salmon Flawlessly
The proportion is essential here. Use 1 tablespoon of seasoning for every ½ pound of salmon. This ensures complete coverage without overwhelming the fish’s flavor.
– For grilled salmon or pan-seared salmon: Thoroughly pat 1 pound of fish dry with paper towels (this aids in developing a nice crust). Coat it with about 1 tablespoon of olive oil, then sprinkle with ½ teaspoon of kosher salt and 2 tablespoons of the seasoning mix.
– For baked salmon: Arrange 1 pound salmon on oiled foil on a baking sheet. Pat it dry, sprinkle with ½ teaspoon of kosher salt and 2 tablespoons, then bake.
Storage and Shelf Life
You can keep your homemade salmon seasoning mix in an airtight container for 6 months to 1 year. Naturally, it’s best when freshest!
Spices typically last in a cool, dry location for 8 months to 1 year. This spice blend can rejuvenate spices you’ve had for some time.
More Salmon Seasoning Variations
If you’re looking to diversify from this mix, here are additional ways I favor seasoning salmon:
For more inspiration, check out my guide on the finest sauces for salmon.
Dietary Notes
This salmon seasoning recipe is vegetarian, gluten-free, vegan, plant-based, dairy-free, naturally sweet, refined sugar-free, low-carb, and keto-friendly.
Frequently Asked Questions
Can I substitute regular paprika for smoked? Yes, but the taste will be less intricate. Smoked paprika provides a unique smoky depth that standard paprika cannot replicate. If you opt for sweet paprika, consider adding a small dash of liquid smoke to your salmon prior to seasoning.
Can I prepare this blend in advance? Certainly! I suggest making a double or triple batch and storing it in an airtight jar. It preserves for 6 to 12 months and accelerates weeknight cooking significantly.
Does this seasoning work on frozen salmon? Yes, but ensure that the salmon is fully thawed and thoroughly dried before applying the seasoning. Excess moisture hinders the spices from adhering properly and prevents the fish from achieving a nice crust.
Is this seasoning spicy? No, this blend is savory and smoky but not hot. There’s no chili powder or cayenne, making it suitable for families and those who do not enjoy spicy food.
Enchanting Salmon Seasoning
Allow this delightful salmon seasoning to work its wonders on your fillets! This blend enhances the fish’s flavor, whether it’s baked, pan-seared, or grilled.

Fragrant Spiced Wine Drink
**Scaling Up: Providing Mulled Wine for a Crowd**
When organizing a gathering, having an adequate supply of drinks is essential for a successful occasion. Mulled wine, with its cozy, spiced notes, is an excellent selection for entertaining during the chillier seasons. If you’re anticipating a substantial number of attendees, think about increasing the quantity of your recipe to satisfy the need. By either doubling or even tripling the recipe, you can effectively serve a large audience. A useful suggestion is to acquire two bottles of wine for a doubled recipe. Contemporary kitchen appliances such as a Slow Cooker or Instant Pot are perfect for this task, as they can effortlessly manage larger amounts. For ease, several online recipes include a “2x button” feature, enabling you to double the ingredients with just a click, ensuring you preserve the ideal flavor balance.
**Storage and Reheating: Keeping Your Mulled Wine Fresh**
Mulled wine can be made ahead of time and stored, making it a practical choice for gatherings. It can be refrigerated for up to three days when stored correctly. To keep its quality intact, use an airtight container and make sure to strain out the spices prior to storage. When it’s time to serve, reheating is simple. Pour the mulled wine into a pot and gently heat it over low heat, being careful not to let it come to a boil, as this could change the flavors. For those who like a quicker approach, individual servings can be warmed in the microwave. Nevertheless, many prefer the stovetop method for preserving the taste and aroma better, offering a more delightful experience for your guests.
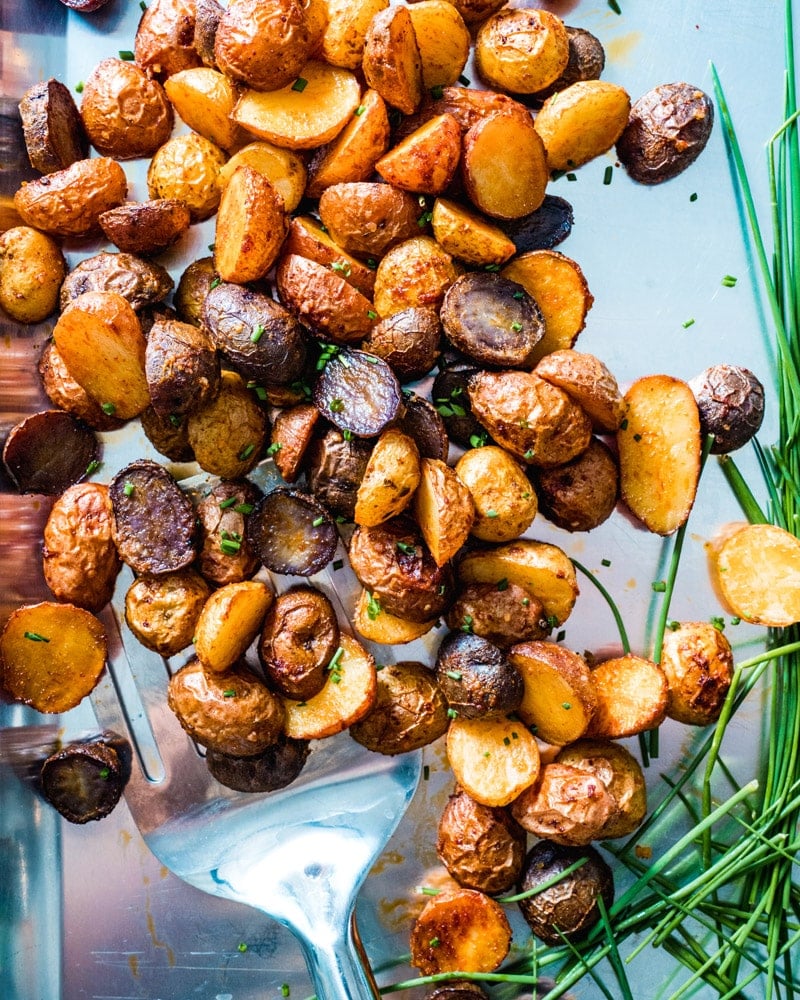
How to Prepare Crunchy Roasted Mini Potatoes
Alex & Sonja: The Culinary Team Behind A Couple Cooks
Introducing Alex and Sonja Overhiser, the energetic pair behind the well-known culinary platform, A Couple Cooks. As writers of two celebrated cookbooks, devoted parents, and a real couple united by their love for cooking, Alex and Sonja have significantly influenced the realm of home cooking. Their adventure started in 2010 when they created A Couple Cooks to spread their enthusiasm for straightforward, seasonal dishes and the pleasure of cooking to a broader audience.
Throughout the years, A Couple Cooks has evolved into a thorough resource for home chefs, featuring thousands of unique recipes, valuable cooking tips, and useful meal planning suggestions. Every recipe is carefully prepared and photographed by Alex and Sonja, ensuring a personal touch and a commitment to excellence. Their recipes are not only tried and tested by the couple but also by their children, making them family-friendly and approachable for cooks of every level.
Alex and Sonja’s cooking philosophy prioritizes simplicity and seasonality, motivating home cooks to utilize fresh, local ingredients to their fullest. Their culinary creations span quick weeknight meals to intricate weekend gatherings, appealing to diverse tastes and dietary needs. Whether you are a beginner cook or an experienced chef, A Couple Cooks has something for all, making the craft of cooking accessible and pleasurable.
Beyond their website, Alex and Sonja have penned two cookbooks that delve deeper into their culinary ideology. These books offer readers an enriching exploration of their cherished recipes and cooking methods, featuring stunning visuals and personal stories that narrate their culinary journey.
As active parents, Alex and Sonja recognize the difficulties of balancing family responsibilities with a love for cooking. Their recipes are crafted to be practical and attainable, providing solutions for those wishing to savor home-cooked meals without investing excessive time in the kitchen. Through A Couple Cooks, Alex and Sonja consistently motivate and empower home cooks globally, one delectable recipe at a time.
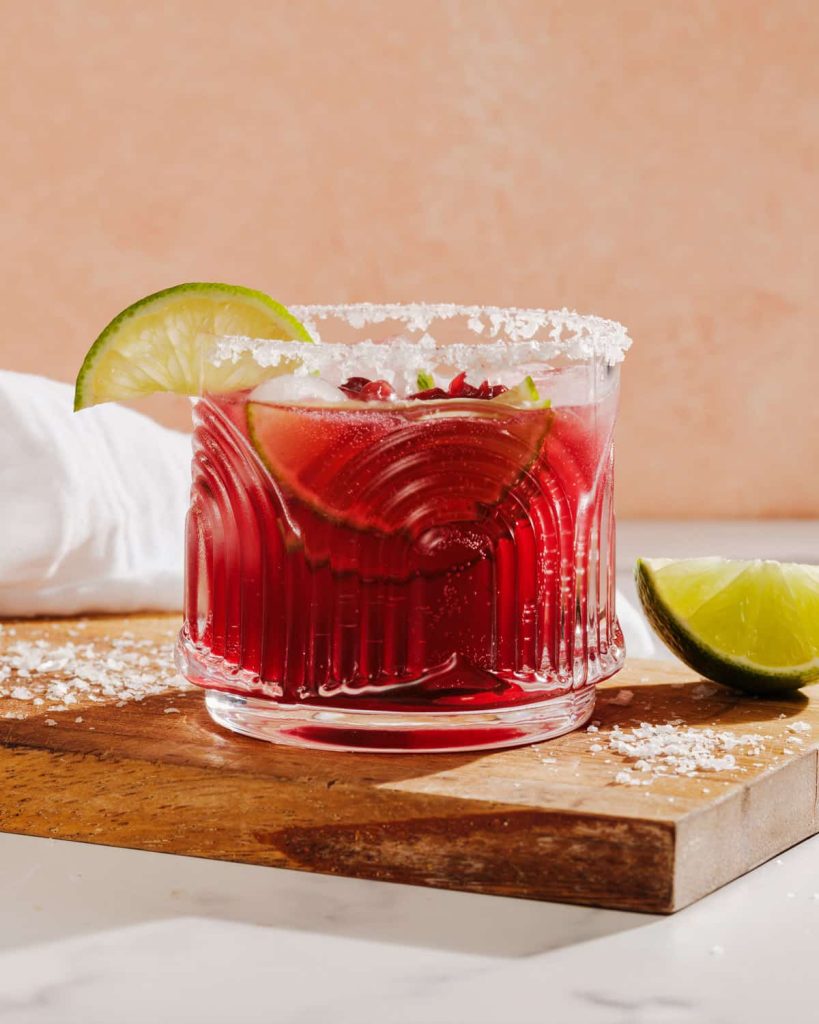
Easy Non-Alcoholic Pomegranate Drink Recipe
Alex & Sonja Overhiser: The Culinary Partnership Behind A Couple Cooks
Introducing Alex and Sonja Overhiser, the energetic pair who have transformed their love for cooking into a flourishing online community. As the writers of two best-selling cookbooks and the creators of the well-known site A Couple Cooks, Alex and Sonja have been motivating home chefs since 2010 with their straightforward, seasonal recipes and contagious passion for culinary creativity.
Alex and Sonja’s adventure in the realm of food blogging started as a personal journey of cooking together as a couple. What began as a pastime rapidly grew into a venue for sharing their culinary innovations with a broader audience. Their website, A Couple Cooks, has become an essential hub for countless original recipes, cooking advice, and meal planning strategies, all designed with the busy home cook in mind.
One distinctive feature of Alex and Sonja’s method is their dedication to crafting recipes that are not just tasty but also accessible. They emphasize the use of seasonal produce to create meals that are both nutritious and enjoyable. Their philosophy is based on the idea that cooking should be a joyous activity, one that unites people and cultivates a sense of community.
As busy parents, Alex and Sonja appreciate the difficulties of managing family life alongside a passion for cooking. They frequently test their recipes on their own children, guaranteeing that each meal is family-friendly and straightforward to prepare. This pragmatic approach has struck a chord with their audience, many of whom seek ways to include healthy, homemade dishes in their everyday lives.
Apart from their website, Alex and Sonja have written two cookbooks that further highlight their culinary skills. These books provide readers with a more in-depth look at their cooking philosophy, featuring beautifully captured dishes and detailed instructions. Each recipe reflects their commitment to making cooking a pleasurable and rewarding endeavor.
Through A Couple Cooks, Alex and Sonja have formed a community of individuals who share their enthusiasm for cooking and good eating. Their website is not just a compilation of recipes; it is a celebration of the happiness that arises from preparing and sharing meals with those you care about. Whether you’re an experienced chef or a kitchen beginner, Alex and Sonja’s inviting approach and delicious recipes are certain to motivate you to start cooking.

Non-Alcoholic Apple Cider Drink
This effervescent apple cider mocktail fuses fresh apple cider, ginger beer, and mint, crowned with a cinnamon sugar rim, creating the perfect winter and fall beverage for festivities or gatherings. Ready in a mere 5 minutes!
As a cocktail aficionado, I’ve begun to favor mocktail concoctions for events: my experience has shown me that no-proof drinks can be just as delightful as their alcoholic counterparts! Furthermore, they are lighter and suitable for everyone.
This apple cider mocktail encapsulates everything I adore about warm winter and fall beverages without any alcohol. It literally takes just 5 minutes to prepare, and whenever I serve it, someone invariably requests the recipe. The cinnamon sugar rim alone makes this worth it! It’s fantastic as a holiday beverage or Thanksgiving mocktail, or whenever you seek a fun drink option.
Why This Apple Cider Mocktail Works
I can’t claim credit for this apple cider mocktail: my husband Alex actually developed the recipe! He originated the idea for the secret ingredient: apple cider vinegar, just like in this pomegranate mocktail. It may sound unusual, but the acidity replicates alcohol and genuinely enhances the cocktail-like flavor!
The apple cider offers sweetness and tang, ginger beer introduces bubbles, and muddled mint and lemon contribute aromatic elements. The highlight is the cinnamon sugar rim: it includes a hint of salt too, which is immensely satisfying! I relished this mocktail with a meal and appreciated how well it complements food, rather than overshadowing it like a typical cocktail.
Ingredients You’ll Need
I’ve crafted this mocktail numerous times, and here’s what I’ve discovered about achieving optimal flavor:
– Unfiltered apple cider: Opt for fresh, unfiltered apple cider—the kind found in the refrigerated section at grocery stores or farmers markets. It boasts significantly more character than filtered versions (which are clear and devoid of sediment).
– Fresh lemon juice: Bottled lemon juice won’t deliver the bright, fresh flavor essential to this drink.
– Apple cider vinegar: This secret ingredient balances the sweetness. It’s the element that prompts people to ask, “What makes this taste so wonderful?”
– Ginger beer: As ginger beer constitutes half the liquid in this drink, it has an impact. I prefer brands like Fever-Tree or Q Ginger Beer.
– Fresh mint: Fresh mint leaves provide a refreshing contrast to the warm spices.
How to Make an Apple Cider Mocktail
The technique is just as crucial as the ingredients. Here’s what to do (or skip to the full recipe below if you’re eager to dive in):
– Start with the rim. Combine brown sugar, cinnamon, and a pinch of flaky sea salt on a small plate. Moisten the edge of your glass with a lemon wedge, then dip it into the sugar mix, ensuring an even coating.
– Muddle effectively. In your cocktail shaker, gently muddle the lemon peel and mint leaves together. Approximately 10-15 gentle presses should suffice.
– Shake purposefully. Pour the apple cider, lemon juice, and apple cider vinegar into the shaker with ice. Shake vigorously for about 10 seconds.
– Top with fizz. Strain into your prepared glass filled with fresh ice, then finish with ginger ale. Always add carbonated ingredients last to maintain those bubbles!
Pro tip: You can also prepare a larger batch of the cinnamon sugar mixture and store it in a jar. It’s ideal for rimming glasses, sprinkling on oatmeal, or enhancing homemade hot chocolate.
Serving Suggestions and Variations
This apple cider mocktail is remarkably adaptable. Here are my preferred ways to serve and customize it:
– Create a party pitcher. Multiply the recipe by 8. Pour 2.5 oz into a glass and top with 2 oz ginger beer before serving.
– Transform it into a cocktail. Add 1.5 oz of bourbon, spiced rum, vodka, or even tequila. It becomes akin to my apple cider bourbon cocktail, apple cider martini, or apple cider margarita.
– Experiment with different herbs. I adore mint, but rosemary adds a more savory, wintry essence.
– Incorporate various juices. Combine half apple cider and half cranberry or pomegranate juice. You could also include half fresh squeezed orange juice for a delightful addition.
Storage and Make-Ahead Tips
While this mocktail is best enjoyed immediately to maintain the carbonation, you can prepare components in advance:
– Cinnamon sugar rim mixture: This remains fresh for 6 months in an airtight container.
– Apple cider mixture: Blend the apple cider, lemon juice, and apple cider vinegar up to 24 hours prior. Keep it refrigerated (see notes in the recipe).
Frequently Asked Questions
Can I use apple juice instead of apple cider? No! Apple cider possesses a deeper, more concentrated apple flavor that makes this mocktail exceptional.
Why do you add apple cider vinegar? The vinegar imparts a subtle acidity and complexity.
Tasty Salmon Spice Blend
This enchanting salmon seasoning mixture turns any salmon into a remarkably flavorful fish in just minutes. Crafted with smoked paprika, garlic powder, and a selection of savory spices, it is perfect for grilled, baked, or pan-seared salmon.
Wishing to elevate your salmon’s taste to the extraordinary? Give my enchanting salmon seasoning a try! I refer to it as magical since it genuinely transforms a piece of plain fish into something fabulous.
This blend is suitable for any type of salmon and offers a finely balanced spice mix that enhances the fish’s inherent richness. After discovering this combination of flavors, I ceased using any other seasoning recipes. Just grab a jar of this salmon seasoning and you’re all set, whether you decide to grill, bake, or pan fry!
Why This Is the Ultimate Salmon Seasoning
I assure you, everyone will notice when you incorporate this salmon seasoning! Over the years, I’ve received numerous compliments on this recipe.
In its creation, I drew inspiration from Old Bay seasoning, renowned for seafood, and merged it with elements from my favorite blackened seasoning. The outcome is a blend that tastes like something you’d find in a restaurant, utilizing spices readily available in your pantry!
The hidden gem here is smoked paprika. This Spanish spice contributes a delicate smoky richness, making it a worthy addition. Each time I include it in my seasoning mixes, people take note!
5 Star Reader Review
⭐⭐⭐⭐⭐ “This seasoning is fantastic!! I added about 2 tbsp of soft brown sugar since we prefer our salmon a bit sweet and it was perfect. The best salmon I’ve had in quite a while.” -Shelly E.
Ingredients You’ll Need
Here’s what goes into this salmon seasoning mix, along with kosher salt:
– Smoked paprika: This is a Spanish variant of paprika created from peppers that are smoked over a flame. It’s available in the spice aisle of most grocery stores and online, often labeled as pimentón, Spanish smoked paprika, or sweet smoked paprika.
– Garlic powder: Provides savory, aromatic qualities that pair well with fish.
– Onion powder: Introduces complexity without being overpowering.
– Thyme: A traditional herb for seafood that offers subtle earthy undertones.
– Celery seed: This is the key ingredient from Old Bay that binds everything together.
– Cumin: Contributes warmth and a touch of earthiness.
– Allspice: This also imparts background warmth (the secret additive from blackened seasoning).
How to Season Salmon Flawlessly
The proportion is essential here. Use 1 tablespoon of seasoning for every ½ pound of salmon. This ensures complete coverage without overwhelming the fish’s flavor.
– For grilled salmon or pan-seared salmon: Thoroughly pat 1 pound of fish dry with paper towels (this aids in developing a nice crust). Coat it with about 1 tablespoon of olive oil, then sprinkle with ½ teaspoon of kosher salt and 2 tablespoons of the seasoning mix.
– For baked salmon: Arrange 1 pound salmon on oiled foil on a baking sheet. Pat it dry, sprinkle with ½ teaspoon of kosher salt and 2 tablespoons, then bake.
Storage and Shelf Life
You can keep your homemade salmon seasoning mix in an airtight container for 6 months to 1 year. Naturally, it’s best when freshest!
Spices typically last in a cool, dry location for 8 months to 1 year. This spice blend can rejuvenate spices you’ve had for some time.
More Salmon Seasoning Variations
If you’re looking to diversify from this mix, here are additional ways I favor seasoning salmon:
For more inspiration, check out my guide on the finest sauces for salmon.
Dietary Notes
This salmon seasoning recipe is vegetarian, gluten-free, vegan, plant-based, dairy-free, naturally sweet, refined sugar-free, low-carb, and keto-friendly.
Frequently Asked Questions
Can I substitute regular paprika for smoked? Yes, but the taste will be less intricate. Smoked paprika provides a unique smoky depth that standard paprika cannot replicate. If you opt for sweet paprika, consider adding a small dash of liquid smoke to your salmon prior to seasoning.
Can I prepare this blend in advance? Certainly! I suggest making a double or triple batch and storing it in an airtight jar. It preserves for 6 to 12 months and accelerates weeknight cooking significantly.
Does this seasoning work on frozen salmon? Yes, but ensure that the salmon is fully thawed and thoroughly dried before applying the seasoning. Excess moisture hinders the spices from adhering properly and prevents the fish from achieving a nice crust.
Is this seasoning spicy? No, this blend is savory and smoky but not hot. There’s no chili powder or cayenne, making it suitable for families and those who do not enjoy spicy food.
Enchanting Salmon Seasoning
Allow this delightful salmon seasoning to work its wonders on your fillets! This blend enhances the fish’s flavor, whether it’s baked, pan-seared, or grilled.
Read More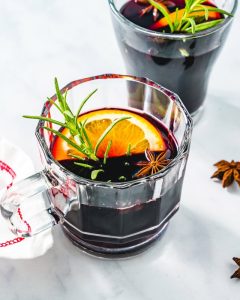
Fragrant Spiced Wine Drink
**Scaling Up: Providing Mulled Wine for a Crowd**
When organizing a gathering, having an adequate supply of drinks is essential for a successful occasion. Mulled wine, with its cozy, spiced notes, is an excellent selection for entertaining during the chillier seasons. If you’re anticipating a substantial number of attendees, think about increasing the quantity of your recipe to satisfy the need. By either doubling or even tripling the recipe, you can effectively serve a large audience. A useful suggestion is to acquire two bottles of wine for a doubled recipe. Contemporary kitchen appliances such as a Slow Cooker or Instant Pot are perfect for this task, as they can effortlessly manage larger amounts. For ease, several online recipes include a “2x button” feature, enabling you to double the ingredients with just a click, ensuring you preserve the ideal flavor balance.
**Storage and Reheating: Keeping Your Mulled Wine Fresh**
Mulled wine can be made ahead of time and stored, making it a practical choice for gatherings. It can be refrigerated for up to three days when stored correctly. To keep its quality intact, use an airtight container and make sure to strain out the spices prior to storage. When it’s time to serve, reheating is simple. Pour the mulled wine into a pot and gently heat it over low heat, being careful not to let it come to a boil, as this could change the flavors. For those who like a quicker approach, individual servings can be warmed in the microwave. Nevertheless, many prefer the stovetop method for preserving the taste and aroma better, offering a more delightful experience for your guests.
Read More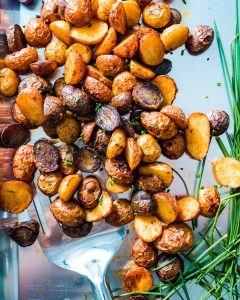
How to Prepare Crunchy Roasted Mini Potatoes
Alex & Sonja: The Culinary Team Behind A Couple Cooks
Introducing Alex and Sonja Overhiser, the energetic pair behind the well-known culinary platform, A Couple Cooks. As writers of two celebrated cookbooks, devoted parents, and a real couple united by their love for cooking, Alex and Sonja have significantly influenced the realm of home cooking. Their adventure started in 2010 when they created A Couple Cooks to spread their enthusiasm for straightforward, seasonal dishes and the pleasure of cooking to a broader audience.
Throughout the years, A Couple Cooks has evolved into a thorough resource for home chefs, featuring thousands of unique recipes, valuable cooking tips, and useful meal planning suggestions. Every recipe is carefully prepared and photographed by Alex and Sonja, ensuring a personal touch and a commitment to excellence. Their recipes are not only tried and tested by the couple but also by their children, making them family-friendly and approachable for cooks of every level.
Alex and Sonja’s cooking philosophy prioritizes simplicity and seasonality, motivating home cooks to utilize fresh, local ingredients to their fullest. Their culinary creations span quick weeknight meals to intricate weekend gatherings, appealing to diverse tastes and dietary needs. Whether you are a beginner cook or an experienced chef, A Couple Cooks has something for all, making the craft of cooking accessible and pleasurable.
Beyond their website, Alex and Sonja have penned two cookbooks that delve deeper into their culinary ideology. These books offer readers an enriching exploration of their cherished recipes and cooking methods, featuring stunning visuals and personal stories that narrate their culinary journey.
As active parents, Alex and Sonja recognize the difficulties of balancing family responsibilities with a love for cooking. Their recipes are crafted to be practical and attainable, providing solutions for those wishing to savor home-cooked meals without investing excessive time in the kitchen. Through A Couple Cooks, Alex and Sonja consistently motivate and empower home cooks globally, one delectable recipe at a time.
Read More
Easy Non-Alcoholic Pomegranate Drink Recipe
Alex & Sonja Overhiser: The Culinary Partnership Behind A Couple Cooks
Introducing Alex and Sonja Overhiser, the energetic pair who have transformed their love for cooking into a flourishing online community. As the writers of two best-selling cookbooks and the creators of the well-known site A Couple Cooks, Alex and Sonja have been motivating home chefs since 2010 with their straightforward, seasonal recipes and contagious passion for culinary creativity.
Alex and Sonja’s adventure in the realm of food blogging started as a personal journey of cooking together as a couple. What began as a pastime rapidly grew into a venue for sharing their culinary innovations with a broader audience. Their website, A Couple Cooks, has become an essential hub for countless original recipes, cooking advice, and meal planning strategies, all designed with the busy home cook in mind.
One distinctive feature of Alex and Sonja’s method is their dedication to crafting recipes that are not just tasty but also accessible. They emphasize the use of seasonal produce to create meals that are both nutritious and enjoyable. Their philosophy is based on the idea that cooking should be a joyous activity, one that unites people and cultivates a sense of community.
As busy parents, Alex and Sonja appreciate the difficulties of managing family life alongside a passion for cooking. They frequently test their recipes on their own children, guaranteeing that each meal is family-friendly and straightforward to prepare. This pragmatic approach has struck a chord with their audience, many of whom seek ways to include healthy, homemade dishes in their everyday lives.
Apart from their website, Alex and Sonja have written two cookbooks that further highlight their culinary skills. These books provide readers with a more in-depth look at their cooking philosophy, featuring beautifully captured dishes and detailed instructions. Each recipe reflects their commitment to making cooking a pleasurable and rewarding endeavor.
Through A Couple Cooks, Alex and Sonja have formed a community of individuals who share their enthusiasm for cooking and good eating. Their website is not just a compilation of recipes; it is a celebration of the happiness that arises from preparing and sharing meals with those you care about. Whether you’re an experienced chef or a kitchen beginner, Alex and Sonja’s inviting approach and delicious recipes are certain to motivate you to start cooking.
Read More
Non-Alcoholic Apple Cider Drink
This effervescent apple cider mocktail fuses fresh apple cider, ginger beer, and mint, crowned with a cinnamon sugar rim, creating the perfect winter and fall beverage for festivities or gatherings. Ready in a mere 5 minutes!
As a cocktail aficionado, I’ve begun to favor mocktail concoctions for events: my experience has shown me that no-proof drinks can be just as delightful as their alcoholic counterparts! Furthermore, they are lighter and suitable for everyone.
This apple cider mocktail encapsulates everything I adore about warm winter and fall beverages without any alcohol. It literally takes just 5 minutes to prepare, and whenever I serve it, someone invariably requests the recipe. The cinnamon sugar rim alone makes this worth it! It’s fantastic as a holiday beverage or Thanksgiving mocktail, or whenever you seek a fun drink option.
Why This Apple Cider Mocktail Works
I can’t claim credit for this apple cider mocktail: my husband Alex actually developed the recipe! He originated the idea for the secret ingredient: apple cider vinegar, just like in this pomegranate mocktail. It may sound unusual, but the acidity replicates alcohol and genuinely enhances the cocktail-like flavor!
The apple cider offers sweetness and tang, ginger beer introduces bubbles, and muddled mint and lemon contribute aromatic elements. The highlight is the cinnamon sugar rim: it includes a hint of salt too, which is immensely satisfying! I relished this mocktail with a meal and appreciated how well it complements food, rather than overshadowing it like a typical cocktail.
Ingredients You’ll Need
I’ve crafted this mocktail numerous times, and here’s what I’ve discovered about achieving optimal flavor:
– Unfiltered apple cider: Opt for fresh, unfiltered apple cider—the kind found in the refrigerated section at grocery stores or farmers markets. It boasts significantly more character than filtered versions (which are clear and devoid of sediment).
– Fresh lemon juice: Bottled lemon juice won’t deliver the bright, fresh flavor essential to this drink.
– Apple cider vinegar: This secret ingredient balances the sweetness. It’s the element that prompts people to ask, “What makes this taste so wonderful?”
– Ginger beer: As ginger beer constitutes half the liquid in this drink, it has an impact. I prefer brands like Fever-Tree or Q Ginger Beer.
– Fresh mint: Fresh mint leaves provide a refreshing contrast to the warm spices.
How to Make an Apple Cider Mocktail
The technique is just as crucial as the ingredients. Here’s what to do (or skip to the full recipe below if you’re eager to dive in):
– Start with the rim. Combine brown sugar, cinnamon, and a pinch of flaky sea salt on a small plate. Moisten the edge of your glass with a lemon wedge, then dip it into the sugar mix, ensuring an even coating.
– Muddle effectively. In your cocktail shaker, gently muddle the lemon peel and mint leaves together. Approximately 10-15 gentle presses should suffice.
– Shake purposefully. Pour the apple cider, lemon juice, and apple cider vinegar into the shaker with ice. Shake vigorously for about 10 seconds.
– Top with fizz. Strain into your prepared glass filled with fresh ice, then finish with ginger ale. Always add carbonated ingredients last to maintain those bubbles!
Pro tip: You can also prepare a larger batch of the cinnamon sugar mixture and store it in a jar. It’s ideal for rimming glasses, sprinkling on oatmeal, or enhancing homemade hot chocolate.
Serving Suggestions and Variations
This apple cider mocktail is remarkably adaptable. Here are my preferred ways to serve and customize it:
– Create a party pitcher. Multiply the recipe by 8. Pour 2.5 oz into a glass and top with 2 oz ginger beer before serving.
– Transform it into a cocktail. Add 1.5 oz of bourbon, spiced rum, vodka, or even tequila. It becomes akin to my apple cider bourbon cocktail, apple cider martini, or apple cider margarita.
– Experiment with different herbs. I adore mint, but rosemary adds a more savory, wintry essence.
– Incorporate various juices. Combine half apple cider and half cranberry or pomegranate juice. You could also include half fresh squeezed orange juice for a delightful addition.
Storage and Make-Ahead Tips
While this mocktail is best enjoyed immediately to maintain the carbonation, you can prepare components in advance:
– Cinnamon sugar rim mixture: This remains fresh for 6 months in an airtight container.
– Apple cider mixture: Blend the apple cider, lemon juice, and apple cider vinegar up to 24 hours prior. Keep it refrigerated (see notes in the recipe).
Frequently Asked Questions
Can I use apple juice instead of apple cider? No! Apple cider possesses a deeper, more concentrated apple flavor that makes this mocktail exceptional.
Why do you add apple cider vinegar? The vinegar imparts a subtle acidity and complexity.
Read More
Weekly Meal Schedule for December 1, 2025
### Receive Tasty New Recipes Every Day
In the current fast-moving environment, carving out time to prepare meals can be quite difficult. Nevertheless, with appropriate tools, you can turn cooking into a delightful and effortless activity. One of the optimal methods to elevate your cooking journey is by getting tasty new recipes every day. This not only keeps your dining experience fresh but also motivates you to experiment with various ingredients and culinary methods.
#### Reasons to Subscribe for Daily Recipes
1. **Diversity**: Daily recipes present you with an extensive array of cuisines and cooking techniques. This diversity helps in avoiding the repetitiveness of making the same dishes over and over.
2. **Skill Enhancement**: Exploring new recipes can boost your cooking abilities. You’ll acquire new methods, flavor pairings, and plating techniques, which will increase your confidence in the kitchen.
3. **Meal Organization**: With daily recipes, you can better organize your meals. Having a set plan for each day can conserve time and alleviate the anxiety associated with last-minute food choices.
4. **Healthier Options**: Numerous recipe subscriptions concentrate on healthy eating habits. By accessing nutritious recipes, you can make improved dietary choices for yourself and your family.
5. **Community Connection**: Enrolling in a recipe service often links you with a network of fellow cooking enthusiasts. You can exchange ideas, experiences, and even adaptations of the recipes you try.
#### Steps to Subscribe
Subscribing to a daily recipe service is straightforward. Generally, you’ll need to enter your email address and consent to receive updates. Numerous services also provide options to tailor your preferences according to dietary needs or preferred cuisines.
For instance, you might come across a subscription form similar to this:
– **Email Address**: Necessary for receiving daily recipes.
– **GDPR Agreement**: A checkbox to confirm your agreement to receive emails.
– **Name**: Optional section for personalization.
After you complete the form and submit it, you’ll begin receiving delightful recipes straight to your inbox.
#### Easy Unsubscribe
A significant advantage of subscribing to a recipe service is the convenience it provides. If you ever feel inundated or decide to opt-out of daily recipes, you can swiftly unsubscribe. Most services feature an “unsubscribe” link at the bottom of their emails.
#### Connect on Social Media
Many recipe services also have a presence on social media channels. Following them on platforms like Facebook, Instagram, Pinterest, and others can offer extra inspiration, tips, and community engagement.
#### Final Thoughts
Welcoming the chance to receive tasty new recipes daily can revolutionize your cooking habits. It promotes experimentation in the kitchen, supports healthier eating practices, and links you with a community of food enthusiasts. Whether you’re just starting or a veteran cook, subscribing to a daily recipe service is a step toward enhancing the enjoyment and variety of your meals.
Read More
Recipe for Turkey BBH Noodle Broth
# Hue Style Turkey Noodle Soup: A Tasty Method to Savor Thanksgiving Leftovers
Thanksgiving is an occasion for family, appreciation, and of course, a celebration of food. Nevertheless, one of the highlights of the holiday frequently arrives after the feast: the remnants. Among the diverse meals that can be crafted from leftover turkey, a prominent option is Hue Style Turkey Noodle Soup. This dish not only makes use of the turkey carcass to generate a flavorful stock but also transforms the typical Thanksgiving spread into a lively and tasty soup inspired by Vietnamese flavors.
## The Delight of Leftovers
Many individuals have their personal favorite methods of enjoying Thanksgiving leftovers. While some lean towards turkey chili or sandwiches, others, like the creator of this recipe, cherish the concept of recreating a dish that reflects the original Thanksgiving spread. However, the real enchantment lies in utilizing those leftovers to create entirely new culinary offerings, such as the spicy turkey vermicelli noodle soup, a variation of the traditional Vietnamese bun bo hue.
## What is Bun Bo Hue?
Bun bo hue is a spicy noodle soup that hails from the Hue area of Central Vietnam. Traditionally prepared with beef, this dish showcases thick vermicelli noodles floating in a fragrant lemongrass broth, enhanced by tender pieces of meat and a variety of fresh herbs. The soup is celebrated for its intricate flavors, merging spicy, savory, sour, and sweet elements, earning it a special place in many hearts.
In this version, leftover turkey substitutes the beef, and a lemongrass turkey stock is prepared to deliver a unique and delectable twist on the classic recipe.
## How to Prepare Hue Style Turkey Noodle Soup
### Ingredients
#### For the Turkey Lemongrass Soup Stock
– 1 turkey carcass
– 3-4 stalks of lemongrass (bruised and cut into 4″ lengths)
– 2 cloves of garlic
– 1 shallot (split)
– 1.5 tbsp sugar (or ~20 grams of rock sugar)
– 8-9 cups water
#### For the Lemongrass Chili Oil
– 1/2 cup neutral oil
– 1-2 tbsp red pepper flakes (divided)
– 2 shallots (chopped)
– 6-8 cloves of garlic (chopped)
– 1/4 cup lemongrass (chopped)
– 1 tbsp sugar (or ~10 grams of rock sugar)
– 2 tbsp fish sauce
– 1 tbsp shrimp paste (optional)
#### To Finish
– 12-16 oz dried rice vermicelli (thick hue style noodles)
– 1 lb leftover turkey (sliced or diced)
– Red onion (thinly sliced)
– Mint (roughly chopped, optional)
– Cilantro (roughly chopped, optional)
– Green onions (sliced, optional)
– 1 lime (cut into wedges)
### Instructions
1. **Make the Stock**: Adjust the oven racks to accommodate a large pot in the center and preheat to 200°F. Place the turkey carcass, lemongrass, garlic, shallot, and sugar into the pot, covering it with water. Bring to a gentle simmer, then move to the oven uncovered for 2 hours.
2. **Prepare the Chili Oil**: In a small saucepan, heat the oil and chili flakes over medium-low heat, stirring frequently until fragrant. Remove from heat and strain. Return the oil to the pan with shallots, garlic, and lemongrass. Cook over medium heat until the shallots become tender (about 2-3 minutes). Stir in rock sugar until it dissolves, then add red pepper flakes, fish sauce, and shrimp paste.
3. **Strain the Stock**: Take the stock out of the oven and strain it into a large pot. Season with fish sauce to taste, keeping it at a low boil.
4. **Assemble the Soup**: Cook the noodles as per package instructions. Drain and place in warmed bowls. Top with 2 cups of the spicy broth, 1-2 tablespoons of chili oil, and leftover turkey. Garnish with sliced red onions, mint, cilantro, green onions, and lime. Adjust chili oil according to taste for preferred heat.
## Conclusion
Hue Style Turkey Noodle Soup is an exceptional way to repurpose Thanksgiving leftovers into a meal that is not only comforting but also full of flavor. The combination of lemongrass, spices, and fresh herbs creates a delightful experience that enhances the humble turkey into a vibrant dish. So, the next time you have leftover turkey on hand, consider this delightful recipe to maximize your holiday feast. Enjoy!
Read More
Tasty Dishes for a Thanksgiving Breakfast Celebration
Thanksgiving is an occasion for family, appreciation, and of course, scrumptious food. While the primary attention usually centers on the dinner table, beginning the day with a delightful breakfast or brunch can establish the mood for a remarkable holiday. Here are some scrumptious breakfast suggestions to commence your Thanksgiving celebrations:
1. **Pumpkin Pancakes**: Add the flavors of autumn to your breakfast by creating a batch of pumpkin pancakes. These airy pancakes are flavored with cinnamon, nutmeg, and cloves, and can be drizzled with maple syrup or topped with a dollop of whipped cream for an indulgent start to your day.
2. **Cranberry Orange Scones**: These scones blend the sharpness of cranberries with the vibrant citrus taste of orange. Serve them warm with a dash of butter or a drizzle of honey for a sweet and tangy delight.
3. **Sweet Potato Hash**: A savory choice, sweet potato hash is a fulfilling dish that includes diced sweet potatoes, bell peppers, onions, and your preferred protein, like sausage or bacon. Finish it off with a fried egg for an additional protein boost.
4. **Apple Cinnamon French Toast Casserole**: Make this dish the night prior for a hassle-free morning. Slices of bread are soaked in a cinnamon-spiced egg mixture and layered with sliced apples. Bake until golden and serve dusted with powdered sugar.
5. **Butternut Squash Frittata**: This frittata is loaded with seasonal veggies such as butternut squash, spinach, and mushrooms. Incorporate some cheese and herbs for a tasty and satisfying breakfast choice.
6. **Maple Pecan Granola**: For a lighter start, DIY granola featuring oats, pecans, and a touch of maple syrup can be enjoyed with yogurt or milk. It’s a crunchy, fulfilling way to energize for the day ahead.
7. **Eggnog Waffles**: Embrace the spirit of the holiday season with eggnog waffles. These waffles are rich and flavorful, ideal for those who enjoy the taste of eggnog. Serve topped with a sprinkle of nutmeg and a side of fresh fruit.
8. **Baked Brie and Cranberry Pastries**: For a bit of sophistication, consider these puff pastry bites stuffed with creamy brie and zesty cranberry sauce. They are ideal for a brunch assortment and are bound to impress your guests.
By spending a little extra time making a special breakfast or brunch, you can foster a cozy and welcoming atmosphere that will resonate throughout the Thanksgiving festivities. Whether you lean towards sweet or savory, these recipes provide options for everyone to savor.
Read More
Recipes for Thanksgiving Main Dishes
**The Finest Thanksgiving Main Course/Dish Recipes**
Thanksgiving is an occasion for uniting with family and enjoying a feast that honors gratitude and togetherness. While the traditional roast turkey frequently steals the spotlight, there are many other main course possibilities that can enhance your Thanksgiving dinner. Whether you adhere to tradition or venture into unique territories, these recipes provide something for everyone.
**1. Traditional Roast Turkey**
A flawlessly roasted turkey is the iconic Thanksgiving dish. To create a tender and flavorful bird, begin by brining the turkey overnight in a combination of water, salt, sugar, and herbs. On the roasting day, season the turkey with butter, garlic, and your preferred herbs like rosemary and thyme. Roast it in the oven until the skin is golden and the meat is soft. Serve with homemade gravy and cranberry sauce for an authentic touch.
**2. Herb-Encrusted Turkey Breast**
For smaller gatherings, a turkey breast is a practical and tasty choice. Coat the turkey breast with a mixture of olive oil, garlic, and a medley of fresh herbs such as sage, parsley, and thyme. Roast it until the meat is juicy and the herb crust is crunchy. This dish captures the essence of Thanksgiving without the obligation of a whole bird.
**3. Honey-Glazed Ham**
A honey-glazed ham is a sweet and savory option to turkey. Score the surface of the ham and brush it with a glaze created from honey, Dijon mustard, brown sugar, and cloves. Bake it until the glaze is caramelized and the ham is warmed through. The result is a tender, flavorful ham that pairs excellently with classic Thanksgiving sides.
**4. Pot Roast**
For a cozy and hearty main dish, think about serving a pot roast. Sear a beef chuck roast until browned, then slow-cook it with onions, carrots, potatoes, and beef broth. The slow cooking ensures the meat is melt-in-your-mouth tender. This dish is ideal for those who enjoy a robust, savory meal.
**5. Skillet Chicken with Herbs and Lemon**
For a lighter selection, attempt a skillet chicken dish. Season chicken thighs with salt, pepper, and lemon zest, then sear them in a hot skillet. Add garlic, fresh herbs like thyme and rosemary, and lemon slices. Complete cooking in the oven until the chicken is fully cooked and the skin is crispy. This dish is vibrant and bursting with flavor, offering a refreshing option to richer meats.
**6. Roast Lamb with Garlic and Rosemary**
For a refined and flavorful main course, roast lamb is a superb option. Rub a leg of lamb with a blend of garlic, rosemary, olive oil, and lemon juice. Roast it until the meat is tender and infused with aromatic flavors. Serve with mint jelly or a red wine reduction for a gourmet experience.
**7. Vegetarian Stuffed Squash**
For a vegetarian main dish, stuffed squash is a charming choice. Hollow out acorn or butternut squash and fill it with a mixture of quinoa, cranberries, nuts, and herbs. Roast until the squash is tender and the filling is warmed through. This dish is not only visually stunning but also a delightful and hearty vegetarian option.
Thanksgiving is a time to come together with dishes that evoke joy and comfort. Whether you select a classic roast turkey or explore unique options like ham, pot roast, or skillet chicken, these recipes are guaranteed to make your Thanksgiving dinner an unforgettable event.
Read More
Recipes for Side Dishes for Thanksgiving
**The Ultimate Thanksgiving Accompaniment Recipes**
Thanksgiving is an occasion for family, appreciation, and, naturally, a banquet that unites everyone. Although the turkey usually takes the spotlight, it’s the accompanying dishes that genuinely enhance the meal and provide an array of flavors and textures. Whether you lean towards tradition or want to explore something innovative, here are some crucial and straightforward side dish recipes that will make your Thanksgiving remarkable.
**1. Traditional Stuffing or Dressing**
A Thanksgiving essential, stuffing can be crafted with various ingredients to match your preferences. The traditional version features bread cubes, onions, celery, and herbs such as sage and thyme. For a unique twist, think about including sausage, apples, or cranberries for added flavor.
**2. Green Bean Casserole**
This smooth and crunchy dish is essential on numerous Thanksgiving tables. Comprising green beans, cream of mushroom soup, and crowned with crispy fried onions, it’s a cozy side that complements turkey well.
**3. Sweet Potato Casserole**
Sweet potatoes are a versatile ingredient that can be prepared in numerous styles. A sweet potato casserole topped with a buttery pecan crust or marshmallows is a sweet and savory indulgence that pairs nicely with savory items on the table.
**4. Garlic Mashed Potatoes**
No Thanksgiving banquet is finalized without mashed potatoes. Incorporate roasted garlic for a rich and flavorful enhancement. Creamy and buttery, these potatoes serve as the ideal base for gravy.
**5. Roasted Brussels Sprouts**
For a green vegetable accompaniment, roasted Brussels sprouts are a tasty and nutritious option. Coat them in olive oil, salt, and pepper, and roast until crispy. Add bacon or balsamic glaze for an extra flavor boost.
**6. Cranberry Sauce**
Homemade cranberry sauce is a straightforward yet vital side dish. Mix fresh cranberries with sugar and orange juice for a tangy and sweet sauce that offsets the richness of the feast.
**7. Cornbread**
Cornbread is a Southern favorite that brings a hint of sweetness to the meal. Serve it warm with butter or use it as a foundation for cornbread stuffing.
**8. Butternut Squash Soup**
A warm and soothing soup can serve as an excellent starter or side dish. Butternut squash soup, with its creamy consistency and touch of nutmeg, is an ideal pick for a fall celebration.
**9. Roasted Root Vegetables**
A selection of roasted root vegetables like carrots, parsnips, and sweet potatoes adds vibrant color and nutrients to the spread. Simply mix with olive oil, salt, and herbs, and roast until tender.
**10. Macaroni and Cheese**
For a kid-friendly choice, macaroni and cheese is always a favorite. Creamy, cheesy, and comforting, it’s a side dish that everyone is bound to enjoy.
As you organize your Thanksgiving feast, think about harmonizing traditional dishes with fresh and thrilling options. With these side dish recipes, you can craft an unforgettable and delectable banquet that will have everyone returning for more. Relish the experience of preparing and sharing these dishes with your family and friends, and have a Happy Thanksgiving!
Read More